Poop

How To Craft Twitch Stream Titles That Attract New Viewers

It’s a struggle to grow on Twitch organically. Twitch’s platform doesn’t offer many tools and advantages for new and growing streamers to get attention.

But you may be overlooking one extremely important tool that you can use on Twitch.

Your stream title.

And you might be thinking… “It’s just text… nobody reads that stuff.

But what if I told you that there’s an entire industry of marketers and growth hackers that spend millions of dollars testing headlines, titles, and wording?

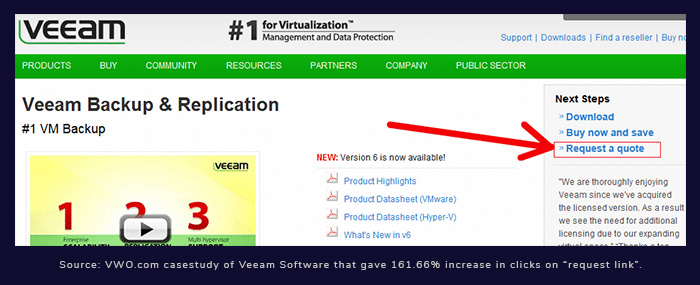
And it pays off. In a certain test we’ve learned that changing a single word can increase the attention of a link by 161%!

Changing “Request quote” to “Request Pricing” got this link clicked 161% more times.

And when it comes to the Twitch director it’s a zero sum game. If a viewer is looking for a new stream or looking through their follower list, they either click your stream or they go to another.

If the viewer chooses your stream it’ll boost you up in the directory, and you potentially get a new chatter, follower or subscriber. If they don’t choose your stream… it buries you deeper as they essentially go to your “competition”.

But how do you craft a stream title that reaches out and grabs a viewers attention and drags them into your stream?

You’ll learn how to do it in this post. And you won’t have to spend millions of dollars like those foolish marketers… you’ll have to spend zero dollars. (it’s free)

Strip out all redundant information

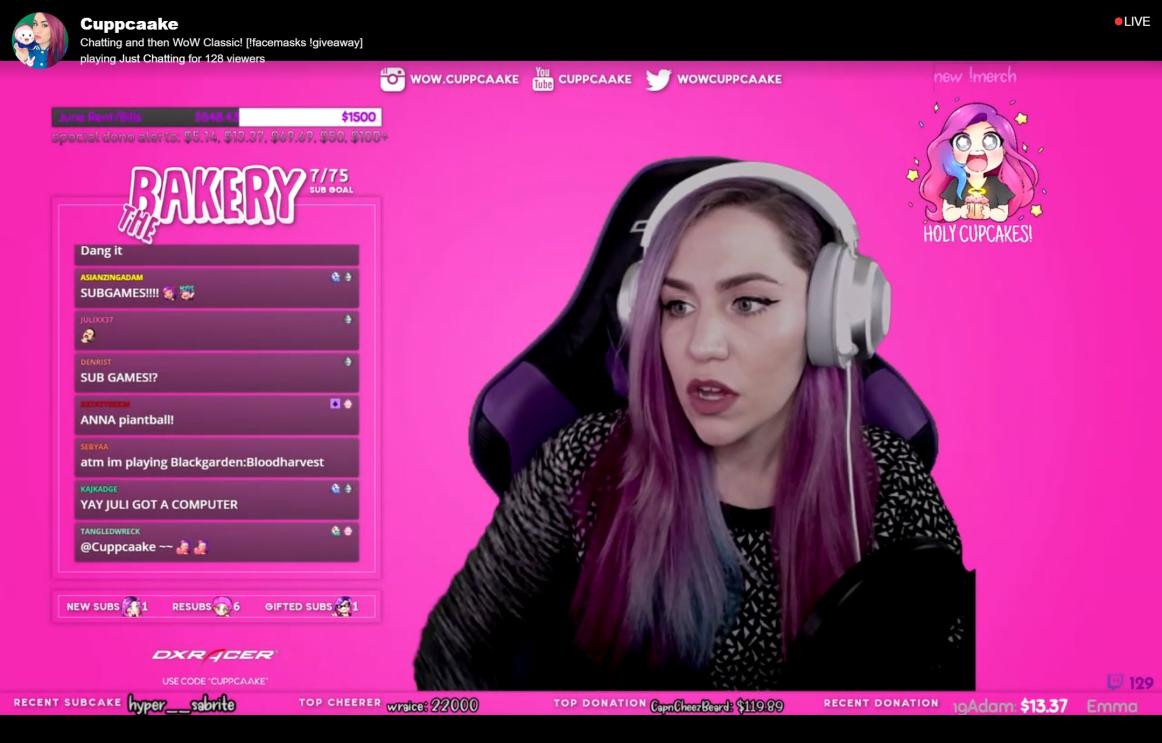
Before you start brainstorming titles, it’s important to remember where your title will be displayed. It will always be next to your stream logo, thumbnail, username, tags, and the game you’re playing.

Don’t waste the few words you have available by restating any of that information.

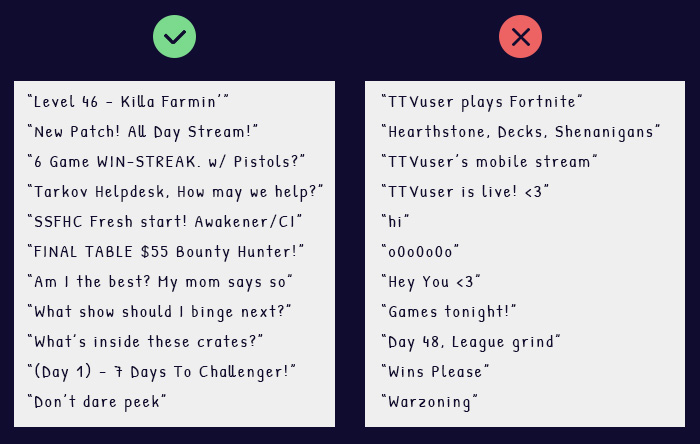
The worst offender of this are titles like:

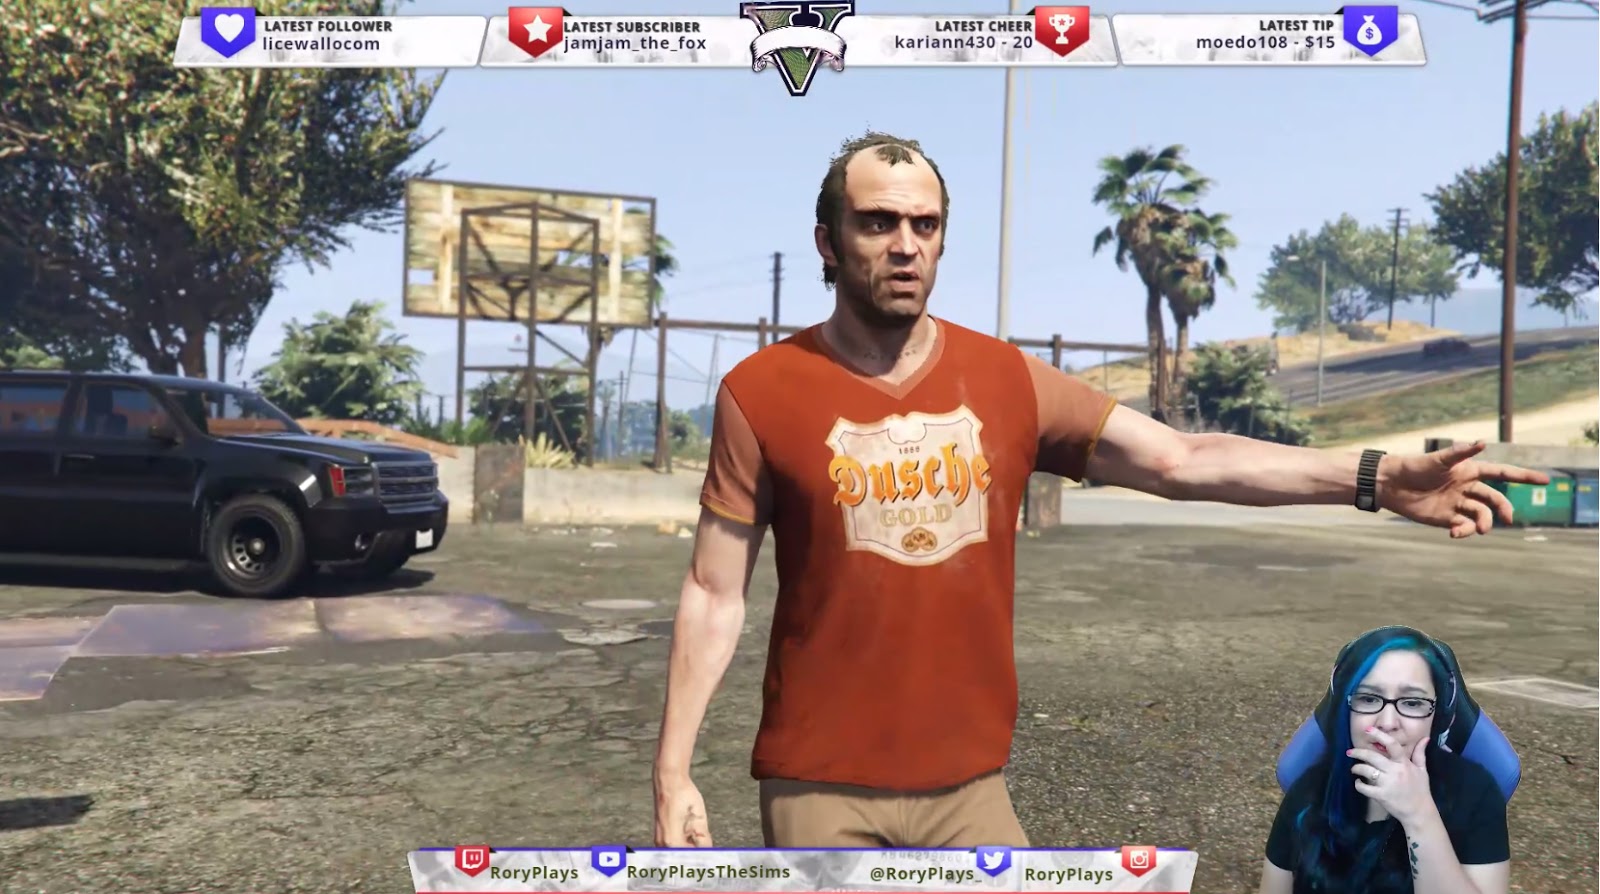
“Bearded guy plays fortnite”
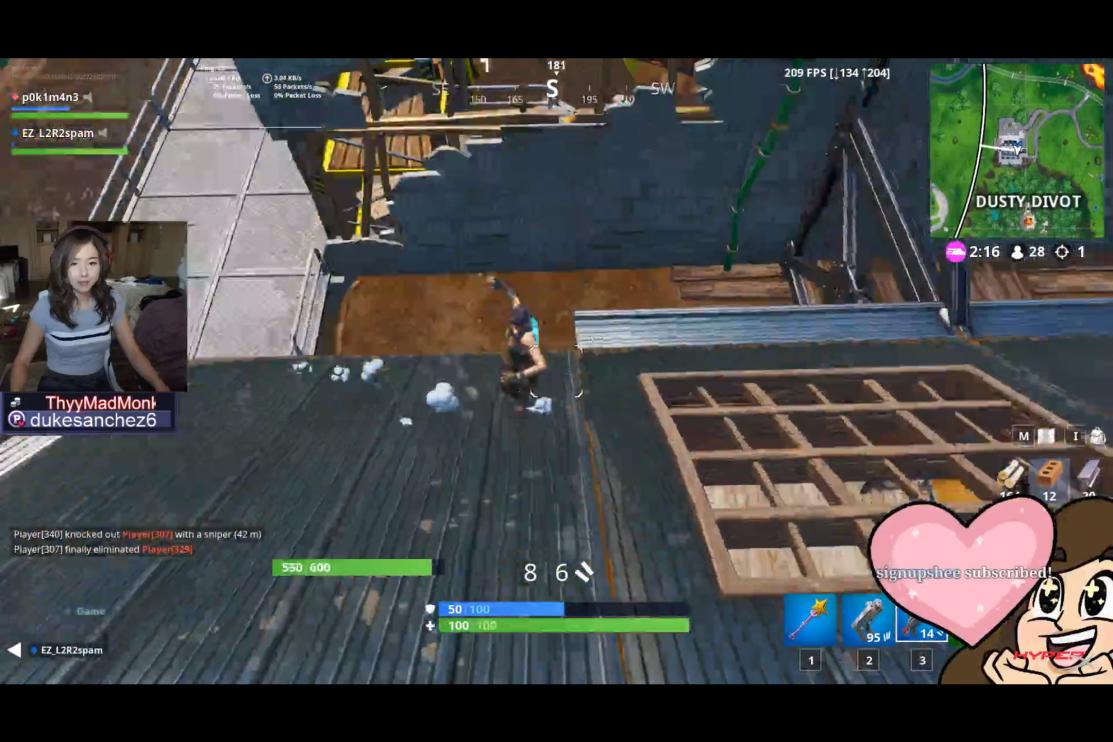
“Girl plays games”

“[Stream Handle] plays [game]”

ALL of the information there can be gathered from the thumbnail and game title and it does nothing to grab a viewers attention.

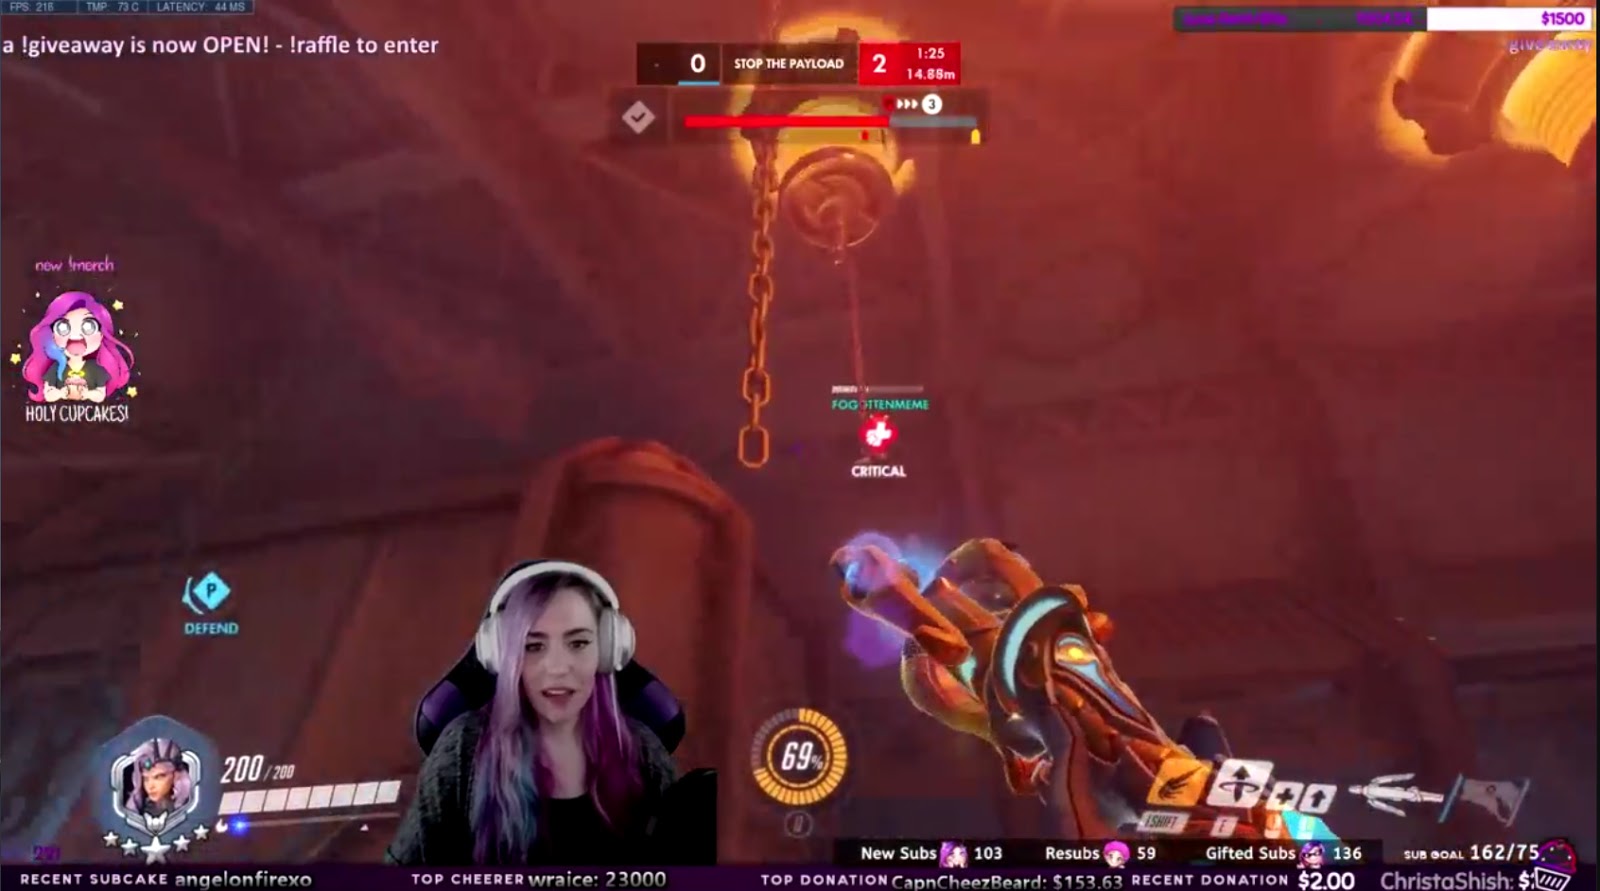
Also, your entire title won’t show in the directory.

On average you have about 25-35 characters that will be visible before it gets truncated. You have to be efficient with what you say and use the space you have available.

That means you want to front-load all “attention getting” information, and move your house-keeping information towards the end of the title. (Things like chat commands for frequently asked questions, news, etc.)

Make a title that is Click-worthy. Not clickbait.

At first you might be drawn to using clickbait strategies. You know those titles you see on social media posts, or YouTube videos that a majority of people find annoying? It might seem like a good idea initially because the goal of your title is to get attention.

But your main goal is to get a new viewer. And it’s difficult to do that if you’re tricking or annoying them before they’re even introduced to your content.

Instead create titles that are Click-worthy. You can do this by using the ingredients below.

Uniqueness

You want your headline to stand out compared to other streamers. Your goal is to zig while everyone else zags.

You can accomplish this by sharing what makes your stream or content unique:

  • What’s your brand? Do you like creating aggressive content? Is your stream just a chill laid back environment? Is your chat full of memes? Showcase your personality.
  • Game level (depth) – Are you a high ranked, high level, or skilled player? Are you a complete beginner? Both of these can be attractive to different types of viewers.
  • Accomplishments – Did you just win a tournament? Hit an achievement? Unlock something in the game? (ex. “Top 50 kills NA”, “Lvl 42”, “Valorant Rank”)
  • Keep it fresh – don’t use the same title every stream. Mix it up and give viewers something new to look at to catch their attention.

Curiosity

One way to make your title irresistible is to make viewers curious, or trigger the psychological phenomenon called the “information gap” or the “curiosity gap”. To put it quickly, when humans are faced with a gap in information, our brain lights up with activity and has a strong desire to fill that gap.

You can use this by combining two pieces of information that are unexpected. Like “6 game win-streak…w/ pistols?”

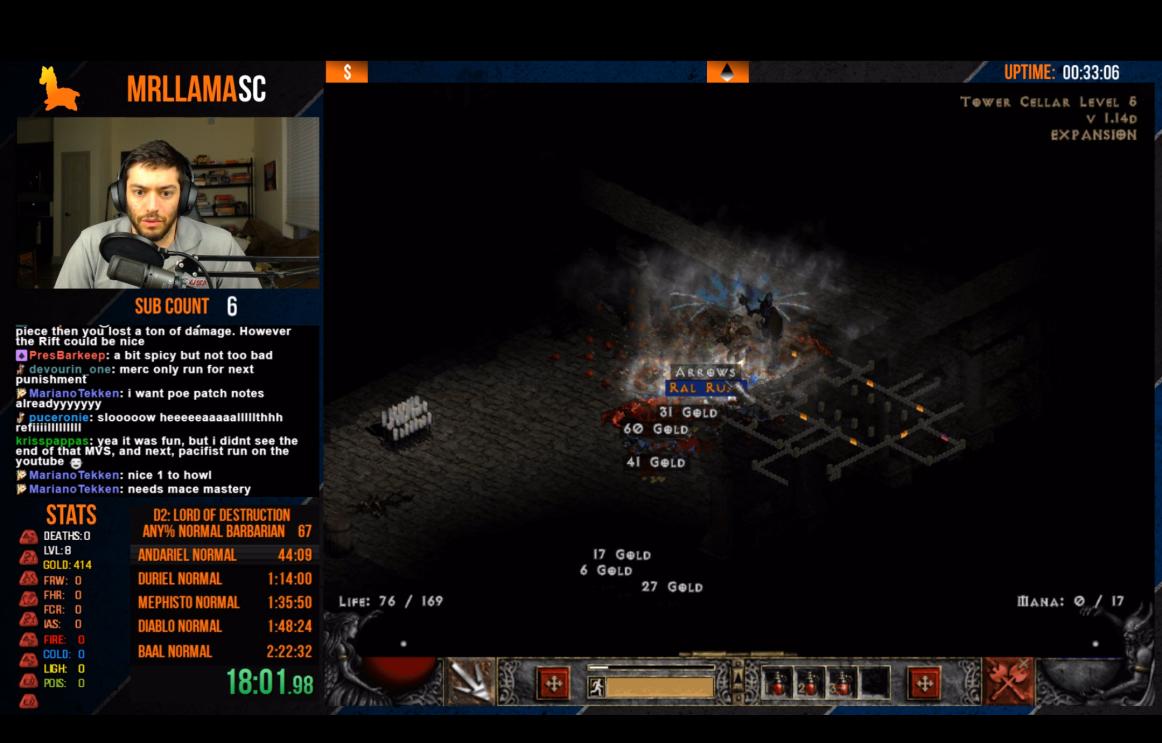
Or you can ask a question. “Beating Atziri without going back to town?” This immediately fills your brain with questions that you want answered. “Is that possible? Can they do that?”, or “I wonder what’s so difficult about that…?”.

Or you can present a conflict: “Beat Final Boss or Pushups” It makes you think “How many pushups have they done?” “Have they beaten the boss yet?” All of this curiosity drives more viewers to click.

You can also get tricky with this one and use the “truncated” message to build curiosity. When your message is too long, Twitch will automatically chop it off to fit in the directory. If used correctly you can have just enough showing to where people will click into your stream just to see the rest of the title because of their own curiosity.

Emotion

You can use emotion to bring your titles to life and make them more eye-catching. Humans are driven by emotion, whether it’s fear, love, hope, joy, or excitement. And you can provoke those emotions by using emotionally charged “power words” to help your titles trigger positive or negative emotions.

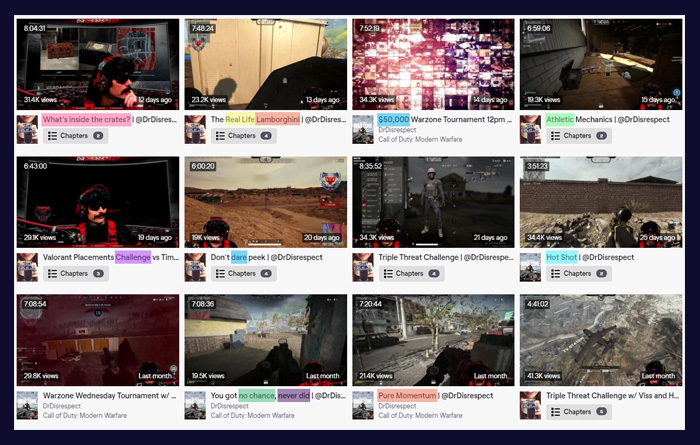
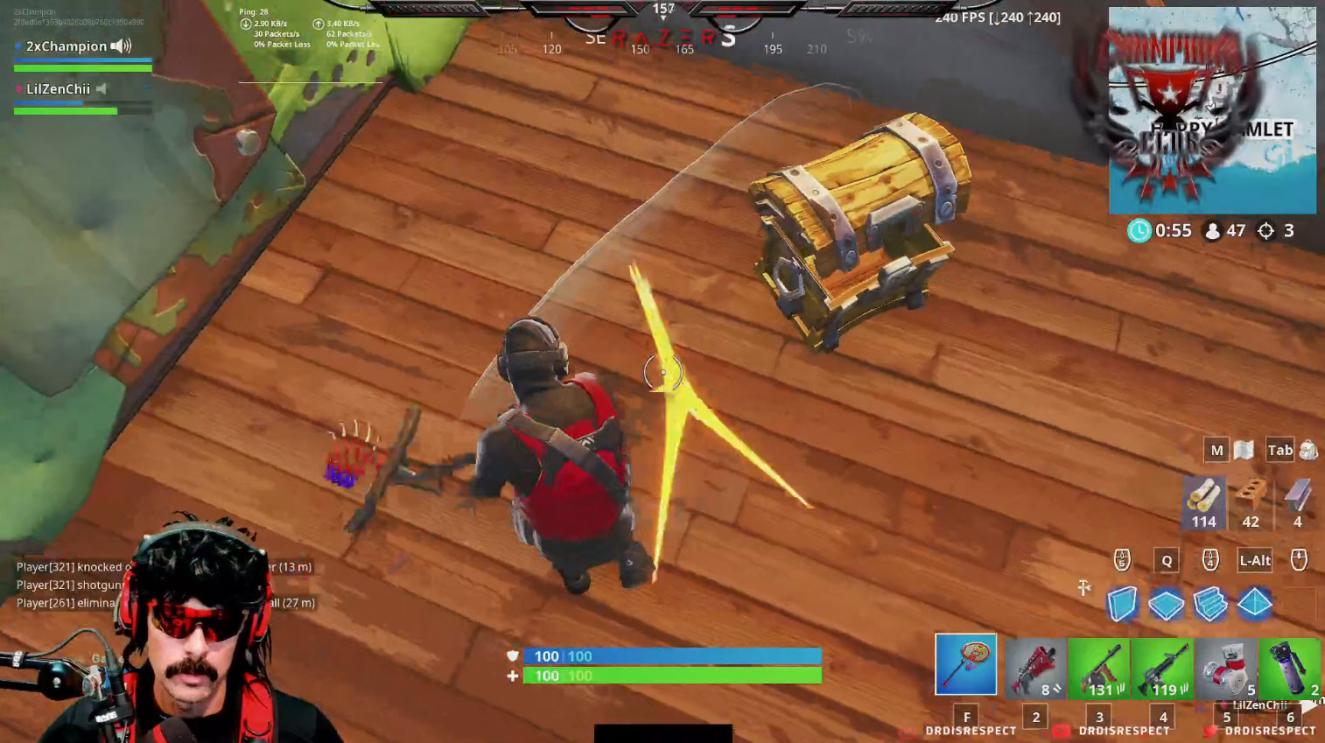
A great example of this is how Dr. Disrespect crafts his titles. He tends to use aggressive words that fit his persona and Use interesting adjectives to spice up your title.

  • Use interesting adjectives or power words to bring your title to life.
  • Bring humor by using game related puns or jokes.
  • Use current events in the game to drive emotion (excitement, anger, boredom, etc.)

Demonstrates a benefit

Most importantly you want your title to be useful for the user. What information do they want to see when they are sifting through all the streams in the category? Or what value do they get out of clicking on your stream?

  • Are you doing something specific in the game? (PvP, PvE, Solo Play, Scrims, Practicing your aim, what type of character or character class are you mainly playing? etc.)
  • Are you actively answering questions for your chat or helping newbies?
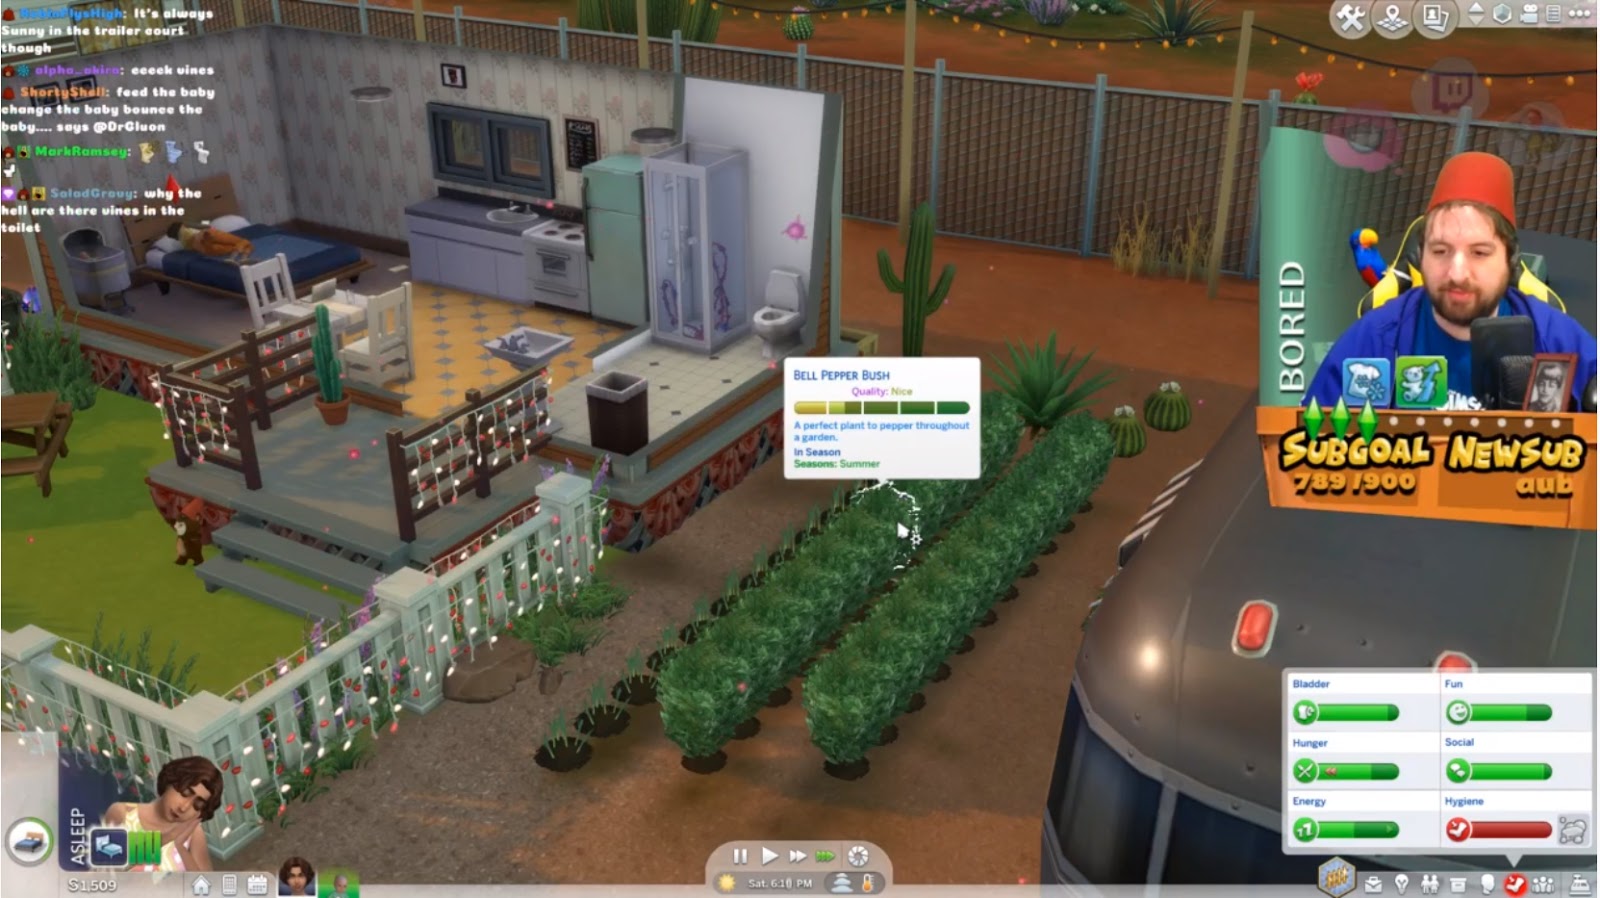
  • Are you demonstrating something or working towards some goal that would be entertaining for viewers?
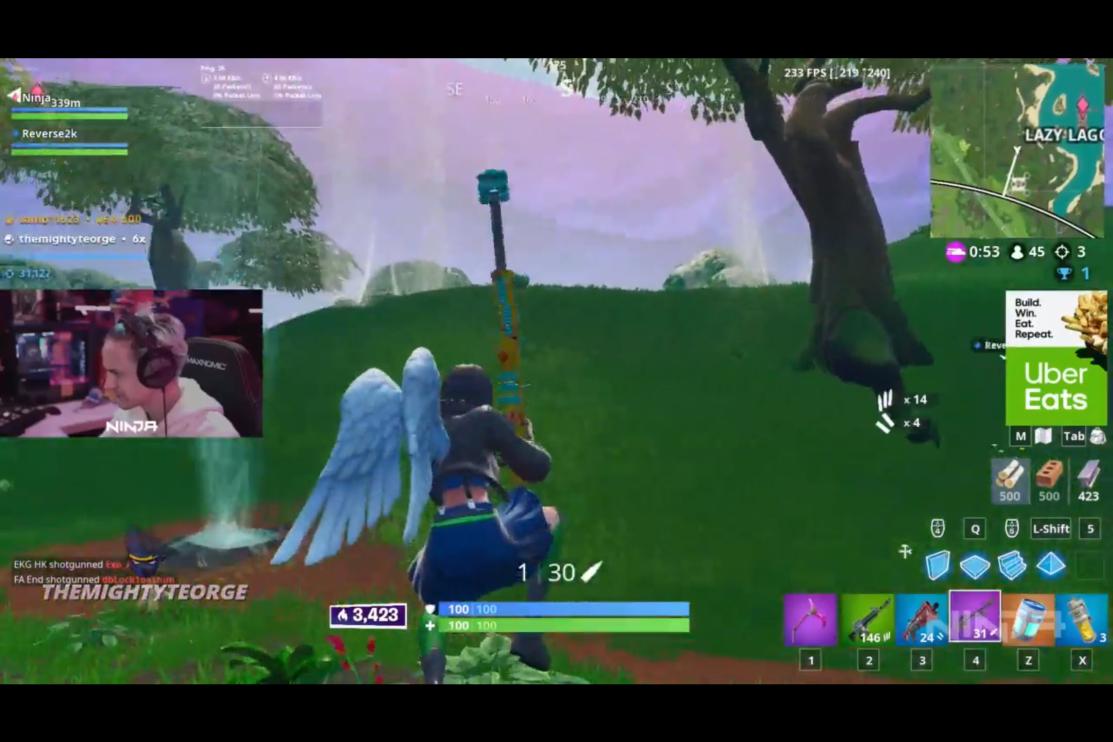
  • Are you playing with someone else that’s notable?

On a whole, viewers don’t come because they want to help you out. They come because there’s a benefit to them. They want entertainment, information, or a community to interact with. Your title can demonstrate that by telling them what’s useful to them, or how it will entertain them if they stop by.

Appearance

You can make your title stand out and catch the eye by using characters or spacing that is unusual. This one can be overdone very quickly so be strategic about how you use it.

You can use special characters like display icons in your title, CAPSLOCK specific words, or even using special characters like # @ $ * () [].

The problem is when you use it too much. It can become spammy or tacky and turns people off just as quick as it grabs their attention. A best practice would be to use it sparingly, or only when it makes sense. For example, use a single icon to grab attention. Or only use other special characters when they make sense based on what you’re sharing in your title.

Urgency

This is a difficult one to implement, but when you can, it works extremely well. Anytime you have a special event, unique opportunity, or time sensitive content, it creates some good ol’ FOMO (fear of missing out) that you can capture in your title.

Poker streamers utilize this all the time when they are close to winning a tournament to potentially win a big cash prize. When they hit the final table, they immediately change their title to include that and also mention the first place prize. 

This makes people join in because they don’t want to miss out on the opportunity to be there when it happens.

You can’t use this one all the time because your content won’t always be urgent. But keep this one in your back pocket anytime you can leverage it, because it works well.

Opinion

Everyone has an opinion and they love sharing it. They also love sharing what they are passionate about. Asking open ended questions can lure people into your stream and get them to share their opinion. This also helps get chatters because they come into your stream ready to chat. It also makes them feel like a member of your community immediately because you’re listening and responding to their feedback.

You’ll get the best result by asking open-ended questions about things people are passionate about. But you want to stray away from topics that are too controversial because that can turn your chat into a toxic environment.

To get you started thinking about topics to ask about, you can ask about things like new features in games, game related opinions, or even current events happening in that games space.

But it doesn’t even have to be about a specific game. One of the best ones I saw was:

“What show should I binge next?”

It works because almost everyone has a favorite show, and they LOVE telling people to watch the show they enjoyed. The streamer had a consistent stream of new viewers coming into his chat throwing out their opinion of what their favorite show was at the time.

Think of this like an icebreaker. Once you get them into your chat and into the conversation, it’s you and your chats job to interact with them and keep them

Mixing The Ingredients

You’ll rarely be able to hit all of these ingredients in one title. But using at least one or pairing a couple of them together makes an effective title and it’ll help your stream stand out.

Make sure that even when using these that you still make titles that are consistent with the type of content that you create. You want your title to showcase you, your brand, and the style of content you create. If not, your title could create a pogo-stick effect when people are coming in and bouncing out because they had different expectations for your content.

Putting it all together

It’s not going to be easy at first. You’ll need to brainstorm multiple ideas in order to come up with a great idea that works as a title and uses as many of the ingredients above.

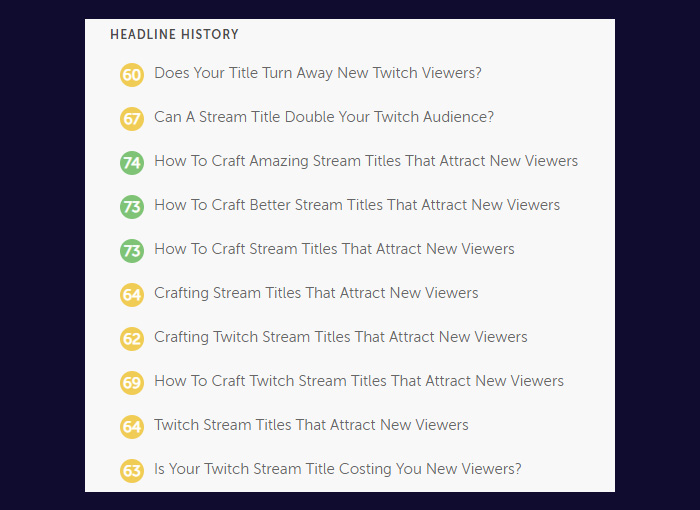
I usually write out 15-20 different headlines before picking one for these blog posts. (The title of the post you’re reading now took 13 until I picked a winner)

With these ingredients in mind you should be able to spot good titles out in the wild, and use them to spark new ideas and improve your own titles.

This is a skill that you will develop over time. It’s worth it though. Because every time you post a YouTube video, add a caption to a Tik-Tok video, or write a post on Twitter – this skill can be translated easily. It helps make your content and message more shareable and reach the masses.

Support

If you liked this article and want to learn more ways to grow your stream make sure you join the newsletter.

Also you can help out by liking or sharing the thread on Twitter:

Poop

8 Twitch Overlay Ideas You Can Use To Create Your Own Custom Graphics

First impressions count. For streamers one of the best ways to create a great one is with a fantastic looking Twitch overlay.

You can use your streaming setup to convey a lot about you. And how your channel looks can be every bit as important as your content. With that in mind, here’s a quick guide to creating that perfect overlay, complete with examples for inspiration.

The first thing you need to explore is what you want your overlay to convey. Here are some basic things to think about:

  • Do you want to customize your overlay based on a game you play most often?
  • Do you need a generic overlay that fits multiple types of games?
  • Do you need functionality to support chatting or IRL streams?

Once you’ve answered these questions you need to get more specific about the type of overlay you want. You can use your overlay to track many different things. When considering your design think about:

  • What information do you need to ensure is visible?
  • What colors suit your style and the games you play?
  • What do you want to track on your overlay?

You can buy a template overlay or design a custom one. It’s a great idea to search through some existing streamers overlays to get some ideas. Here are some to get you started.

MrLlamaSC Speed Run Overlay

Mr Llama primarily does speed runs of games, particularly Diablo. His overlay fits the theme of the game, which he ensures is always visible in its own block of the screen.

To cut clutter on the game screen he keeps his camera and sub counter to one side. This area also shows a limited chat. It allows viewers to view chat while having full screen on.

He uses the rest of the space to track stats specific details to the current speed run, including timings.

The works well because it allows viewers to see all the important details along with fitting in a face cam. He accomplishes this without covering any gameplay.

Pokimane’s Minimal Overlay

Pokimane’s overlay is minimalistic. Proving that less can definitely be more. Her webcam is a simple square with basic tracking underneath.

She has custom alerts for new followers and subscribers but these pop up in the bottom right of the screen. This minimizes the impact on the game.

This setup shows that you don’t need flashy graphics to become successful. Choosing a style which works for you is much more beneficial.

Dr Disrespect’s High Production Value

Dr Disrespect is a successful example of a streamer who goes above and beyond with his streams. He brings one of the highest production values to Twitch.

The Dr Disrespect persona is a character designed to entertain and his entire setup builds on this.

Above you can see the his chatting version of his overlay. It shows his face cam front and centre, fitting in with his inflated ego persona. Below his camera you can also see his social channel details. An important aspect of promotion that a lot of streamers hide in their profile.

His in game setup is much more minimal, like Pokemane’s. His camera sits in the bottom of the screen, while subscription messages appear in the top right.

At the very top a narrow bar tracks some statistics, while his social details remain in the bottom right. The focus is very much on the game here, something which many streamers strive for.

Ninja’s Overlay Design

Ninja’s overlay is another minimal design. (Noticing a trend here among top streamers?) It’s made so you can feel like you’re just chilling with the streamer. The use of a camera off to one side is interesting as it doesn’t show reactions in quite the same way. But instead makes you feel more like you’re sat next to a friend.

One unique aspect is Ninja’s use of on-stream sponsored advertisements. He places them on the far side of the screen to be as unobtrusive as possible, while still being visible.

Cuppcaake’s Just Chatting Themed Overlay

Cuppcaake’s overlay is an example of picking what suits your personality and rolling with it. Her “just chatting” interface clearly shows her love of pink. It even matches her colored hair. The bold choice tells you a lot about her personality and brand.

It’s accompanied by cute emotes and all the information you need. The excessive pink may be in your face but it works for her and her audience. Which is the most important factor.

You can see here that the pink gets toned down when the game comes on. This minimalistic interface focuses mostly on the camera. She places it in the best position for the game she’s playing.

Once again we see the idea of a simple bar which tracks stats without obstructing gameplay. Here it’s accompanied by the camera and a quirky ad for merchandise.

Tabletop Tavern’s DnD Themed Design

HowINerd’s Tabletop Tavern is a fantastic example of a completely themed overlay. In this “just chatting” interface we can see all the persona’s, along with important details about who they are. The follows and subs along the bottom give shoutouts without being intrusive.

Another nice touch are the subtle backgrounds for each character. It showcases that minor touches can go a long way in pulling together an interesting theme.

We can see an extension of the same design idea in this overlay from an in progress game.

The webcams are still in place but move to the bottom to make room for the board above. Character sheets show the stats and info of the person playing. There’s even space for important game information below the dungeon master.

The interface works so well because it’s designed with the viewer in mind. Everything a viewer needs is always on screen when they need to see it. Then adding a beautiful design to highlight those elements gives it that next level feel.

RoryPlays Gameplay Overlay

This interface is an example of a game themed layout. The top bar offers tracking, in a style matched to the game, while the bottom bar does the same with social details. Finally a green screen and webcam ensure the outlay stays simple.

The interface is all customized to the game, including notifications and screens.

RoryPlays transfers from different screens while keeping them all themed together. Whether it’s the “be right back” screen, “starting soon” screen, or gameplay scene, they all match to the brand. It allows the content to flow, rather than having the screens stand out due to huge style differences.

Dr Gluon’s Interactive Overlay

This is not just another game themed interface. Although it does a great job capturing The Sims style. Dr Gluon’s overlay is also animated. The whims above his head and the picture of Jerry in front of him remain static but the moods change. As he plays the game the interface rotates through several different Sims emotions. 

The vibrancy of his overlay, combined with the changing animations helps keep it fun and interesting. It fits with his larger than life, fez wearing streaming persona.

Conclusion

When you design your overlay it’s important to remember that it reflects you and your channel.

If you feel out of your depth in design then remember that a simple overlay can be as effective as a complex one. Some streamers don’t use any overlay at all.

It all depends on your needs and that of your channel. Make sure important information is visible and don’t be afraid to have fun with it. After all an overlay is a great way to show people who you are.

Poop

How to get overlay graphics for your Twitch channel

In this guide you’ll find out how to make a Twitch overlay. We’ll explore different styles and what to think about when planning your screen layout. We will also look the following:

  • Different tools for creating overlays
  • Multiple overlays vs a single solution
  • Overlay design tips

We’ll also explore the benefits of designing yourself versus using a ready made template.

What Will You Use An Overlay For?

Before you start thinking about how you’ll design your overlay you need to work out exactly what you want to use it for.

What you stream on Twitch will have a huge impact on how you design your overlay. If you stream IRL content, such as art or cooking, will have very different needs compared to streaming games. 

So ask yourself these questions to start getting an idea of what you need:

  • What’s your camera setup? Facecam, two camera or no camera?
  • Do you want to display your social media details?
  • What do you want to track? Followers, donations, subs, bits?
  • Do you have a donation or sub goal you’d like to display?
  • What else do you feel your audience will want to see?
  • These questions will help you work out what exactly you want your overlay to display and track.

You’ll use this information to make sure your overlay meets your streaming requirements.

Think About Your Content

Once you’ve decided what you want displayed, the next step is to consider your content.

You don’t want any elements blocking the game play for your viewers. A great way to avoid this is to take a screenshot of the games you most often. If you’re streaming other content, take a couple screenshots from your stream content.

This will help you locate “dead space” that you can fill with your overlay elements.

Use the screenshot’s to block out aspects of the screen which you don’t want to cover with your overlay. It will help you get a visual idea of what space you have to work with.

If you’re struggling to find enough space, a good compromise can be a bar based overlay. You can place bars at the top and/or bottom of your screen to track or display anything you wish. You can even shrink the game display to fit inside these bars so that nothing gets covered.

Let’s get one thing straight.

No matter what another streamer says. No matter what a viewer might say in your chat. There isn’t anything you NEED in your overlay to be a successful streamer.

Every element in an overlay can enhance a stream. But it doesn’t define the success of a stream. Even the webcam. Even alerts.

If you look, you’ll find successful streamers who don’t have a webcam, sub or follow alerts, or even an overlay at all. So don’t think you need any of this to be successful. It does give you the opportunity to show off some personality though!

Consistency Vs Custom

If you stream a variety of games or different situations you have two options. You can build a consistent flexible overlay or create custom overlays for different games. Here are the advantages and disadvantages of each.

Consistent Overlay

Advantages:

  • Maintains consistency in your channels look
  • Less design time needed
  • Easier to tie to channel branding

Disadvantages:

  • May have to tweaked frequently
  • Design may clash with games dominant colors
  • Can become boring

Custom Overlays

Advantages

  • Can tailor to each game
  • Can match themes and colors of game
  • Can cover very specific areas of the screen

Disadvantages

  • More designing time needed
  • Have to create multiple set-ups
  • Harder to maintain a consistent look

Your choice of overlay you use will depend on the content you create. Style it for the aesthetic you desire, and the content you produce. Remember that you can always change your overlay. So try out different layouts and see what works best.

Tools Of The Trade

Now that you’re done planning it’s time to start creating your overlay. The first thing to think about is how customizable you want it and what level of artistic skill you have.

There are three ways to design an overlay:

  1. Designing and building from scratch.
  2. Customizing a template.
  3. Using a design made by someone else.

For those who have artistic skills you can use a program like Photoshop, or freeware alternative GIMP to design your overlay. These programs still have a learning curve. If you’ve never used them it might best quickest to choose another option.

Alternatively you could use a design template. Canva, NerdorDie or similar websites offer free templates. There are also template overlays within Stream Elements. You can also google for free templates and there’s plenty of free resources you can search. Find one that fits your style and you’re off to the races.

Stream Elements allows you to customize your overlay and store different views. The Stream Elements templates can also be helpful even if you choose a design from elsewhere. You can use them as examples to see the code settings needed to track different aspects of your stream.

Overlay Design Tips

First you need to consider screen resolution. If your images don’t match the same resolution of your stream it won’t fit the same way you expect on stream. To best design your overlay add a screenshot of the game or screen you need to place the overlay on as a background. Then you can design or customize the overlay in layers. The background image to ensure the overlay looks good on the gameplay.

Stream Elements has a built in overlay creator. It allows you to adapt the provided templates or add and edit one of your own. Stream Elements templates also include any code which adds trackers to your overlay.

Here are some tips to consider when designing:

  • Giving your bars an opacity of 75% or so allows the game to slightly show through, creating a more dynamic effect.
  • Duplicate elements to ensure sizing is identical.
  • When you add text ensure it is clear and easy to read.
  • Using strokes and drop shadows can help text stand out more.
  • A site like Iconfinder can help you with social media icons, just ensure they are free for commercial use.
  • Ensure your image has a transparent background and you’ve gotten rid of the screenshot before saving.
  • You can save out your camera frame separately. This will enable you to add it as a separate layer, allowing it to be more flexible for moving if needed.

Overall the key to a good layout is ensuring your relevant information is visible without covering any vital parts of the screen.

A great way to find out what you like is to check out other streamers. Load up Twitch and visit some streams. Take a look at their set up and makes notes on what works, what you hate and any ideas you like. Seeing an overlay in use is the best way to get ideas for your own.

Don’t forget that as well as an overlay it’s useful to have a starting soon and break screen. This let’s you switch to these while you load up your games or take a quick comfort break.

Now Go Make Your Overlay

Your overlay is another way to showcase yourself and your channel. Make sure it represents both well. Check that it’s clear, easy to read and not covering anything important. Make sure that it helps the gameplay shine, and doesn’t detract from it.

If you want flexibility then remember to save your camera mount separately. Add it as a unique layer so it can move around when needed.

If you’re in any way unsure Stream Elements can guide you through the basics and you can create a more customized template later. Don’t be afraid to change and adapt as you use the overlay, to ensure it meets your needs.

Poop

A complete guide to get your own Twitch emotes

In this guide you’ll find out how to make Twitch emotes. We’ll take a look at the things you need to think about, as well as Twitch’s rules and guidelines for emotes. This article covers:

  • Generating Emote Ideas
  • Twitch Emote Guidelines and Specifications
  • Emote Design Tips

We’ll also discuss the benefits of designing yourself versus commissioning an emote artist.

Step One: Consider Your Community

The first step in emote design requires you to think about your community. Emotes help bond a community together, so it makes sense to first consider what they would want. You can even ask them. Letting your viewers take part in the ideas process can help make the emotes feel like a real community effort.

Let’s start brainstorming. Here are some questions to ask yourself:

  • Are there any words or phrases often used in your chat?
  • Do you have a name for your followers?
  • Does your other branding have a theme?
  • Are there specific games or genres which you often play?

The answers to these questions can often spark ideas, even if some don’t translate to an emote.

Many streamers tie their emotes into their branding. This can reinforce aspects of your style or personality. Emotes can also link to common themes or games found on your channel.

When narrowing down ideas think about the size of emotes. You need to pick themes which viewers can understand in a small and simple graphic. Your emotes are a reflection of you and your channel so ensure they are an accurate one.

Step Two: Think About Emote Situations

Once you have a theme it’s a good idea to consider the type of situations you want emotes for. There are many common emote uses, so you need to consider which come up most often in your channel. Here are some ideas:

  • A welcome/hello emote – Celebrate new followers and subs or just say hi
  • A LOL/facepalm emote – A staple in most communities
  • A hype/excitement/love emote – Express your happiness
  • A RIP/Death emote – Mourn your in-game demise

The above will cover some common situations you may want to use emotes in but they are far from the only ideas. Emote slots unlock as your community grows. So once you have the basics covered you can work on making some more niche or unique emotes.

Think of your emotes as a mini-ad for your channel. Every time a sub uses your emotes, it could entice another viewer into joining the community and subbing themselves.

With that in mind, think about moments in your stream where there is a lull in activity. Creating emotes to keep chat active is another strategy.

If you want to strike gold, make emotes unique and interesting. When they get used in other streams, it catches peoples eyes. This can get you new viewers or new subs just from interesting emotes.

Here are some other ideas for emote themes:

  • Panic emote – Use when things go wrong
  • Lurk emote – For those who don’t want to speak but want to say something
  • BRB emote – Gives subs something to spam during AFK moments
  • Rage emote – When things get too much
  • Gasm/Booty emote – For when words aren’t appropriate
  • Sad/crying emote – For those games which make you feel things

You can change your emotes at any time. So feel free to mix it up and see which ones get used the most. Community feedback is great for this so let them tell you what they want to express.

Step Three: Expand On Your Ideas

Once you have some ideas, the next stage is to take these and begin to sketch out rough outlines.

Even if you struggle with drawing. Seeing your ideas take some form can help you decide which ones work and which don’t.

Creators who aren’t artistically gifted may choose to commission an artist. Having rough sketches is still worthwhile either way, as they will help guide an artist. The more details you can get down on paper, the better the result will be.

One important thing to remember is to be unique. Don’t steal or copycat. Recoloring or even straight out copying emotes you find is a bad idea. Not only are you not being unique, but it could get you in trouble for breaking copyright.

You should also take care to use only photos or images that you own the rights to use or have created yourself. You are a professional, ensure your emotes reflect this. If you aren’t a designer, it might be best to hire one in these cases.

Step Four: Check The Guidelines

Twitch has guidelines for emotes, so you need to be sure to follow them. Check that your emotes comply at the planning stage. You don’t want to end up commissioning or drawing an emote which goes against the terms of service. They will get denied and you’ll waste a ton of time or money.

Some of the guidelines are obvious. Things like no hateful conduct, violence or offensive language and gestures. But you also need to stay away from politics, animations, and individual letters. Unless you are a partner and can justify their use in relation to your branding.

Twitch is also known for its strict guidelines on nudity and sexual content. While some streamers do have emotes of body parts or variants of the Kreygasm emote, these have to be clothed and tame in nature. Checking out other Twitch emotes is a good way to gauge what is or isn’t allowed.

Step Five: Design Your Emotes

Once you’ve found your themes you need to start designing your emotes and adding in the details. Here are some quick tips to help you get it right.

  • Design at a large size and scale down to help avoid blur. Many artists suggest 800px x 800px as a base size.
  • Exaggerant the tiny details, so they stand out when the emote is downscaled.
  • Your best off to use software such as GIMP, Photoshop, or a custom emote maker. This will allow transparent backgrounds, and more design features unlike MS Paint.
  • Try and link your emotes together. Remember you want them to get used often. So having a common theme works well when used together.
  • If you’re struggling to design your own emotes you can also consider commissioning an artist. This will allow you to build a cohesive look for your brand, even if you struggle with art yourself.

Step Six: Check The Technical Specs

As well as conforming to content guidelines, emotes must also follow the technical rules set out by Twitch. Every emote submitted must be:

  • A .png file
  • Less than 25kb in size
  • Submitted in 3 sizes, 28px x 28px, 56px x 56px and 112px x112px
  • Have a transparent background
  • Easily readable
  • Clear and sharp

You will also need to choose a unique code that’s added after your emoticon prefix. Every emote has a prefix which relates to your channel name. That gets followed by a suffix which describes the emote.

Summary

The most important thing to remember is that emotes are a reflection of you, your channel, and your community. Make sure they are unique, easy to read and fun to use. Allow them to become a part of your channel and your branding.

You can also change emotes, so don’t be afraid to experiment with different themes and ideas. Just make sure not to make too many quick and drastic changes, or you risk confusing viewers.

Try and use your emotes to build on your branding and help your community express themselves.

Most of all make sure you love the result, emotes should always be something you’re proud of.

Poop

Everything you need to know to make and download Twitch Clips

Twitch clips are a great way to share your communities best moments with the world. It can be a great marketing and growth tool if you know how to use it too.

Clips can capture the highs and lows of a stream. Offering a tiny glimpse into jokes and situations which you want to share with new viewers. Like highlights they never expire. So you can continue to access them, building up a summary of your channels best moment over time.

In this guide you’ll learn how to clip on Twitch, what to clip, and how to share them to grow your channel.

Creating Clips

You can create clips from your live broadcasts and VODs. It’s easy and anyone can do it. It’s also important to note that anyone can create VODs even viewers that don’t follow a channel.

All you need to do is hover your mouse over the stream’s video to bring up the overlay. Click the “clapper board” icon in the bottom right.

Clicking this will create the clip and open the clip editor in a new tab.

It will display an editor that shows about 90 seconds of video leading up to where you clicked the clip button.

If you didn’t quite hit the right timing don’t worry. The clips trimming feature allows you to edit and adjust the timing. You can trim a clip down to as little as 10 seconds or extended for up to 60 seconds. Letting you get the perfect slice of content.

Once you’ve finished enter a title and hit publish. This will save changes and give you a share link. Note that the streamer can see a notification that you made a clip.

If you want to delete a clip, click the gear icon on any clip viewing page and select the option to remove the clip.

A clip displays the username of the streamer, the clipper, the game that’s being played, and the title of the stream at the time of clipping. 

Creating Clips on Mobile

To create a clip on iOS tap on the screen during the stream. You can then hit the share icon and select create clip. For Android users tap on the screen then hit the create clip button on the video player.

Managing And Sharing Clips

Every channel has a clips tab, where you can see every saved clip.

Viewers can then use filters and sorting to locate the ones they want. If you’re looking for clips that YOU made you can use this handy link

For broadcasters that want to manage clips created from their channel you can do this in the clips tab. Navigate to the video manager and click on the clips tab. From there click on “Clips Manager”.

Here you can see clips you’ve created as well as clips taken from your broadcasts. This will allow you to view all clips. You can moderate clips by using timeout, ban and delete functions if needed.

To share a clip select the desired clip and then hit the share button. This will allow you to post to any connected social platforms including Facebook, Twitter and Reddit. You can also copy the clip to a clipboard which will allow you to share it in chat or embed it into your feed.

A more advanced method would be to download the clip. This allows for better editing and rendering the video in a format that is more fit for other platforms. Right-click on the video and select “Save As”. This will download the video as an mp4 that you can use in your editing software.

When sharing clips its a good idea to think about your audience.

Sharing game clips into a community for that game can be a great way to generate interest for your stream. You can also share them to your social channels so viewers who missed your stream can stay up to date. It’s also a good way to introduce new potential viewers to your stream.

What Content Should You Clip

Clipping is a great way to share your communities highlights. But if used too often it could lead to over saturation. You want to ensure that clips are relevant, funny and engaging. Here are some things to think about before you clip:

  • Is the moment funny? 
  • Is it relatable? 
  • Does it make you smile? 
  • Does it sum up your community? 
  • Does it capture an important moment or event? 
  • Is it embarrassing or cringe-worthy?

If you answered yes to one or more of these, then make that clip. Clips should showcase the absolute best of your channel. Moments which are funny, heart-warming, relatable or “share worthy” will gain more traction with new audiences.

A Word of Caution

Embarrassing moments can also be good to clip. But remember that streamers are people too. Some might not react well to having their mishaps highlighted. Some cringe-worthy assumptions, mis-pronunciations or embarrassing gaming moments can make great clips but they only work if the broadcaster is on board. If they’d rather forget their failure then you may find yourself with a timeout or ban for clipping and sharing with the world.

Naming Clips For Optimal Sharing

When naming clips think about who you are trying to reach and why. A clip name can help generate views but it needs to be named appropriately. Trying to find a name which sums up the clip but also sounds exciting or intriguing can be difficult.

Think about the audience, the clip and the result. Naming a clip something like “Broadcaster meets a hilarious demise” is more enticing than “Broadcaster fails”. Details are great, just don’t go overboard. Here are a couple of naming tips.

  • Keep names short but descriptive 
  • Remember that the broadcaster and game names are in the clip description so you don’t need to include them again.
  • Avoid excessive punctuation
  • Clickbait or dramatic titles can evoke varying reactions, so use them carefully.

It may also be worth thinking about search engines if you are trying to use the clips to get new viewers. Try to use titles that would match something that someone would search when trying to find the clip. A huge mistake streamers make is using creative titles, and no one can find the clip again. Be descriptive of the content that’s inside the video so if people want to find it again, they can.

Conclusion

In summary clipping is a quick and easy way to share your communities best moments. Make sure clips are short, engaging and interesting. Giving them brief but descriptive and enticing titles can help them spread further.

Remember that unlike your streams content, clips are “static”. This means that they will stick around until deleted. This gives you the ability to archive content and use it as a marketing piece to grow your channel. Or at least it will act as a small overview of your channel.

Poop

Finding The Best Time To Stream On Twitch

Streaming gives content creators a unique opportunity. Being able to reach a live audience all around the world at any time during the day.

But choosing the right time to stream has a huge impact on the amount of viewers you can reach with your broadcasts.

We’ll break down the facts to help you decide the best time to stream on twitch for you.

What is the peak time for Twitch? Let’s look at the data.

If location is key for businesses, then timing is key for streamers. It makes sense to try and schedule your streams for when you have the chance to get the most viewers.

There are two things to keep in mind when looking into peak Twitch time stats.

  1. What is the peak viewer times?
  2. How does peak viewer times relate to how many streamers are broadcasting?

Let’s dive into the data. We might be able to find pockets of time where viewer counts are much higher than the amount of streamers. (Hint: there is)

Peak Viewer Time For Twitch

According to Twitchtracker, the lowest viewer time is around 3:00 a.m. EST. (They are using GMT time so it shows as 5 hours ahead)

This steadily increases until about 1:00 p.m. EST where it holds until 3:00 p.m. EST. From there it begins to decline for 12 hours until 3:00 a.m. EST. 

The same trend appears on every popular stat site like Sullygnome, Twitchtools, and Twitchapps.

The reason you’re seeing this trend is that it starts with the U.S. night-owls and morning European crowd. As the Euro crowd moves into the afternoon, the U.S. morning crowd is tuning in. This starts the push of viewers towards the peak time. It tops out as U.S. gets closer to peak viewing time while European viewers are in evening hours.

Peak Streamer Time For Twitch

It’s one thing to know when all the viewers are there. But how many streamers are vying for that attention?

If we overlay the streamer count to the total viewers, we start to see something interesting.

At first glance it looks like it’s pretty similar. As the view count starts to soar, so does the amount of streamers.

But if you look closely, you start to see something very interesting.

The viewer count rises quicker than the streamer count!

Streaming in the morning gives you a larger potential viewer base, without as many streamers to compete with.

After it peaks, the streamer count holds steady while the viewer count drops. Meaning those streamers are all fighting for less viewers.

Which results in viewer ratios like the graph from Sullygnome:

The green represents is viewers per channel, the higher it is, in theory, the easier it is to get viewers.

The blue represents live channels. The lower that is compared to the green reveals the pockets of time where it’s most advantageous to stream.

This is the big picture view though. We’re talking hundreds of thousands of viewers. This represents the idea that you CAN reach more viewers during these time slots. But it’s not the only factor. Factors like:

  • The language of the audience you stream to
  • The game(s) you want to stream
  • Or even what other streamers are doing

These can all influence the ease or difficulty of getting new viewers.

Let’s take a look at these factors individually.

What Are Other Streamers Doing?

Take a look at what other streamers are doing for the games you stream. You want to zig while everyone else is trying to zag.

Are there any celeb-like streamers that always attract viewers?

For a long time Kripparian dominated the late night Hearthstone space. When his stream started up, Hearthstone streamers would see their numbers plummet. (You’d even see people spamming chat that they were leaving because Kripp went live). These streamers absorb a lot of the viewers no matter what you do.

In this situation you can try to schedule your stream near the end of their stream. Those viewers need somewhere to go once the stream is over. You also have the chance to get a lucky host from the big streamer at the end of their stream.

Or you can plan your stream to end right after theirs starts. Giving you the ability to host them and get your foot in the door for networking with them.

This doesn’t mean you shouldn’t stream while other big streamers are live. Because as an added benefit of having a big streamer in your game category, it pushes the game up higher in the directory.

The higher it is in the directory the more chance you have of new viewers checking it out from the browse tab. This attention can spread to your channel if there aren’t many streamers. Or if you’re able to hold one of the top 4-6 spots of your games listings. But, in most cases, it’s usually advantageous to stream before or after the big streamer.

How does the streamer to viewer ratio change throughout the day?

There are usually pockets of time that you can find that have less streams making it easier to pick up viewers.

You can use a tool like Twitchstrike to find these times easier. Enter in the game(s) you play and scroll down to the heat map section. I prefer to look at the “Ratio Heat Map” on the left. The darker purple squares are blocks of time where the ratio of viewers to streamers is the highest.

This saves you the work of checking your game category manually throughout the day. You can come here and see the averages for the last 7 or 28 days.

Consider peak times for the game(s) you play

Different games have different peak hours. To figure this out you can use Twitchstrike like mentioned above. But it’s also a good idea to think about the audience you’re trying to stream to. Some games have younger or older audiences. Other games are more popular in different countries. Take this into consideration when forming your schedule.

Fortnite, Roblox, and Minecraft generally have a younger audience watching. That means viewers peak in the summertime. Also school hours or bed times can influence off-peak hours.

On the other hand, games like Magic: The Gathering, Dungeons & Dragons, and Escape From Tarkov tend to draw in a much older crowd. Work hours can affect this time, but also this crowd usually stays up later.

What schedule works best for you?

Having a consistent schedule is a crucial to building a following for your stream. It’s better to have a lighter schedule that you know you can stick to.

You want your viewers to get into the habit of tuning into your streams. You want them to just know your live.

A mistake a lot of streamers make is to set an ambitious schedule that they don’t follow through with. This makes it difficult for viewers to know if and when you’re live.

Don’t worry!

If you have extra time and want to stream extra you can frame it as a “bonus stream”. You come off as the hero giving back more to your audience. Your audience begins to instinctively learn and rely on your main schedule. It’s a win/win.

Being able to perform and bring energy to your stream is equally important. Finding the right time slots that fit your energy levels, mood, or give you a solid work/life balance affect the results you get on stream. If you can’t entertain the potential audience at a certain time slot, it doesn’t matter how many viewers show up. They won’t stick around if you don’t entertain them.

Network opportunities

The connections you have can help boost the quality of your content and impact your viewership. Often times, these can help you grow quicker than streaming in the most “optimal” time slot.

Do you have friends that stream? Are you apart of any streaming communities? Or do have you built relationships with streamers who are active during a specific time slot? If so, these advantages can put you in a better position than venturing into unknown territory with no connections.

Sure, you can build these same connections. But having them built, or being apart of a community is a huge head start. They could make it worth streaming during less optimal times.

The Best Time To Stream?

Picking the right time to stream will make a huge difference in the potential viewers you can reach. The answer for best time will be different for everyone though.

Use the data here and form a plan to reach the maximum potential audience. Consider the game(s) you stream, the audience you want to reach, your resources, and your available time.

Put some serious thought into how you want to schedule your streams. Remember that consistency is extremely important. Once you set your schedule stick to it like it’s life or death for at least 30 days (the longer the better!). And after that adjust slowly if you see different opportunities.

Poop

How To Set Up Donations On Twitch

If you are a regular, passionate streamer and haven’t yet set up donations on Twitch, what are you waiting for?!

You have the opportunity to make money doing what you love. Let’s get you started on your streaming career with a quick guide on how to set up donations for your channel.

So, “how do I set up donations on Twitch?”, I hear you ask, well, it’s pretty simple if you stick around long enough to find out…

Why should I set up donations?

For many streamers, donations from their viewers is their main source of income and it could be for you too.

It’s a fantastic way for your viewers to express their appreciation for your awesome content. It also allows you to spend more time creating said awesome content, everyone wins!

Let’s get your stream equipped and ready to start accepting donations.

It’s not quite as easy as adding a donation button to your profile. But we’ll walk you through all the steps to get you set up and accepting donations quickly.

Receiving donations via PayPal

If you are looking for one of the easiest ways to accept donations on Twitch, then PayPal is your saviour.

You will want to set up a business PayPal account as it hides your personal details. It’s also free just like a personal account.

Go to the Paypal business section, all you will need to do is confirm your email and provide your business name.

It’s super easy to switch your normal account to a business one too!

The Basic/Quick Set Up

A basic setup is to use a set up a PayPal.me link which makes the process much more streamlined. The clean design and simple interface makes the PayPal.me link the quickest option.

How do you get people to donate via that link? Try mentioning it in your stream. Post your PayPal.me link in your channels chat and even add a donation section on your Twitch channel.

If you want a more advanced set up to have alerts when people donate, you can check below. We show you how to integrate Paypal with other services for streamers.

Adding your PayPal.me link to a donation section on your channel

Adding a donations section to your channel is a piece of cake. It also makes it even easier for your viewers to support your stream.

Go onto your channel, click the “edit panels” switch and then click on the giant + symbol, you can’t miss it.

You will then want to fill in the panel title and description fields. These are pretty self-explanatory. You can add your PayPal.me link to the description along with why people should donate to you.

Using An Image

If you want to use an image or a panel it’s easy to add through editing your channel on Twitch.
 
Navigate to your channel, click on “edit panels” and add a new panel. From here you’ll want to upload an image.
 
Tip: You can leave the “title” blank, so it doesn’t add a text title above your image.
 
 
  • Click add image, and upload the image you want to use.
  • Then enter your paypal.me URL from paypal.
  • Add a description if you’d like to thank donators, tell viewers how you use donations, or sell them on donating!
  • Make sure you hit submit!

Your donation button will be read to go:

Receiving donations through Bitcoin and other Cryptocurrencies

The use of cryptocurrencies to send and receive funds online only seems to increase in popularity throughout the years. The speed, security and low transaction fees tempt many people to make more and more of their payments using these virtual monies.

If you have a cryptocurrency wallet, all you need to do is share your wallet’s address with another user in order for them to pay you. It is also super simple and easy to set up your own cryptocurrency wallet, there are many options out there.

How to receive cryptocurrency donations

Bitpay is the most popular wallet app for most users and is very easy to use! If you open up the app, you will see a “receive” button, go ahead and click on that.

You’ll then see a line of random numbers and letters. Don’t be too intimidated. This is your wallet’s address. Copy it for use on your profile.

You can now create a donation section on your Twitch profile as explained above. Paste your wallet address into the description section and explain what cryptocurrencies the wallet accepts.

You can now receive Bitcoin donations!

Other Twitch donation page services

There are many third-party services out there that Twitch streamers to enhance donations. You can connect your account to these services to activate donation alerts and other features.

Some of the most popular services are StreamLabs, Gaming For Good and Muxy.

These services create a unique donation page for your channel on their website. You can then direct your viewers to this page when making a donation.

We are going to go through how to set up a donation page on StreamLabs. It’s the easiest to understand and has the most features, it’s a no-brainer! This makes it one of the most popular interfaces for accepting donations on Twitch.

First you will want to create an account on StreamLabs. Once you have done this, you can go on your dashboard and select donation settings.

Next click the PayPal option to connect your PayPal to StreamLabs. Now when someone donates through your StreamLabs link, it will deposit into your PayPal account.

You can use other payment methods, but it’s recommended to at least use PayPal. It’s the most popular and trusted payment method on the web.

On the donations settings page, you can also select your currency along with donation limits. Who needs a max limit though?!

Save your settings and now you’re good to go.

The settings page will now display the address you need to receive donations.

It will look like this: https://streamlabs.com/username.

Copy this and add it to your donations section on Twitch.

Utilizing the StreamLabs features on Twitch

StreamLabs can offer you a whole lot when it comes to prompting people to donate on Twitch.

You can add a recent donor widget that displays the names of the last few donors to your Twitch layout.

This is to set up on StreamLabs but only works if you are using a PC currently, not a home console. This may change one day in the future.

You can also use custom alerts that trigger when someone donates for everyone to see.

This not only makes the viewer that interacted feel good but will also encourage other viewers to do the same!

You can customize these alerts in StreamLabs using animated gifs or sounds. The more entertaining the better! It will make more people want to donate so that they can see your amusing alert again!

How to add a donation button to your Twitch stream

Having a donation section on your Twitch profile is all well and good. But if you really want to get it in front of your viewer’s faces, a donation button works wonders.

Here’s how to make a fancy donation button using PayPal:

  1. Login to PayPal, click on your profile and select “my selling tools”.
  2. Click “update” next to the “PayPal buttons” section. Then click the pretty self-explanatory “create a new button” link.
  3. You will see a “choose button type” drop-down list, you will want to select “donations”. You will then want to type your Twitch channel name in the input box.
  4. You can then select “customize text or appearance” to upload your own image that matches your Twitch appearance.
  5. You can now create your button! Not so fast though… After clicking “create button” you will want to go to the email tab and click “select code”. Now copy it and save it somewhere.
  6. Next, log onto Twitch and select channel, click the admin button and then edit.
  7. Create a new donation panel as explained previously. This time you can click “add image”, select the one you uploaded onto PayPal and click done.
  8. Click the “image links to” input box and paste the donation code you copied from PayPal.
  9. You can now submit and it will appear beneath your Twitch stream!

Why donations are important

Twitch donations are one of the main way streamers make money. You might feel weird accepting donations at first, but you aren’t selling out!

Your viewers understand that it takes time and money to do what you do, and they don’t want you to stop! So give them the option to donate and support your journey of creating great content for them to enjoy.

Make sure you thank your donors. Mention them in streams and keep pushing for donations, you deserve it, promise!

Poop

Twitch Raids: How They Work And How To Get More To Grow Your Audience

Since Twitch introduced raids it has given a big boost to streamers who want to grow their community. Both raiding and being raided can really help grow your community. In this article we explore why and how to raid on Twitch for streamers of all sizes and cover advice about:

  • How Raids Work
  • The Benefits Of Raiding
  • The Benefits Of Being Raided
  • How To Respond To A Raid
  • How To Gain More Raids

What Is A Raid?

A raid is when a streamer brings their community into another person’s stream. Raids are a great way to build relationships, grow community, and support your fellow creators.

Raiding As A Streamer

As a streamer you can begin a raid very simply by using the Twitch raid command.

All you need to do is type:

/raid channelname

Then a pop up box will appear alerting your viewers to the raid.

If they do not wish to join in they can click leave. Otherwise their Twitch feed will automatically refresh to the channel you are raiding.

Remember to run through the following quick check list before you raid:

  • Let your viewers know you’re planning a raid, so they can join in on the hype.
  • Tell them who you’re raiding so they know what to expect. And if you know them, give them some details about the streamer you are about to raid.
  • Give viewers a command to type into the chat of the channel you are raiding, to announce your presence.

After 10 seconds you can override the timer and execute the raid. Otherwise it will be automatically executed after another 80 seconds passes.

The channel you raided will also be hosted during the raid. You can change this after the raid has finished.

Handling Incoming Raids

As a streamer you may also be on the receiving end of raids. While raids can be incredibly beneficial, they can also be a source of harassment or abuse. So Twitch allows you to control them.

By default, your channel will automatically accept all incoming raids.

However, you can change the settings to either disable all raids. Or only allow raids from your network (friends, teammates and followed channels).

In your chat channel settings you can also see a list of recent raiders. This allows you to easily connect with new raiders or moderate any issues.

The Benefits Of Raiding

Raids can be beneficial to both the “raider” and the “raidee”. When raiding you should use it as a tool to have a positive impact on your fellow streamers.

Help Other Streamers

Raiding helps increase another channel’s viewers, followers and chat interaction. As a result most content creators are grateful for raids, even if they only bring a few viewers.

Networking

Raiding can be a great networking opportunity. Think of it as a very friendly way to introduce yourself. And they may even reciprocate the kindness by giving you a raid at a later date.

Think of it as a way of getting your foot in the door. Having trouble networking with other twitch streamers? This is a great ice-breaker.

If you raid someone you can send them a message to introduce yourself with context:

“Hey! Hope you enjoyed the raid. I play [Insert Your Game] too, and I love your stream. I’d love to collab some time in the future if you’re up to it.”

Or if you receive a raid you can reach out to them to start a conversation:

“Thanks so much for the raid! I checked out your content after the stream and love what you’re doing. Would you be up for a collab some time in the future?”

Raids Have Mutual Benefits

If you raid a channel some of their viewers may also follow you, as a show of thanks for your support. The receiving channel may also reciprocate the raid at a later date.

Remember: the more community minded you are, the greater the opportunities for collaboration, support, and success. Always find a way to give before even thinking about receiving. So don’t be stingy about your community. Help others grow and they’ll go out of their way to help you too.

The Benefits of Receiving Raids

If you’re on the receiving end of a raid there are a number of benefits for your channel.

Boost Your Stats

A raid will help you increase chat traffic, raise awareness of your channel and will all bump up your viewing figures. This increase then helps boost your stream up the stream directory.

Grow Your Community

Raids are also a chance to grow your community. They offer an opportunity to bring new followers and to connect with other streamers.

Note: It is worth mentioning that raids and hosts do not count towards affiliate or partnership stat requirements.

This is so that each channel is assessed on its individual merits. It stops streamers who may have connections with a large channel and get frequent raids or hosts.

However, if you keep raiders engaged enough for them to follow you, any return visits will count as usual.

What To Do When You Receive A Raid

The most important thing to remember about receiving a raid is not to panic. Have a plan!

Having your channel in front of a new audience is a huge opportunity to add members to your community.

You don’t want to blow the opportunity by repeatedly saying “Thank You” or by being tongue tied for 10 minutes. It’s okay to be grateful and authentic. But remember that you have to capture that new audiences attention. And every second that passes is a chance for them to leave.

This means you should have a plan in place before the raids come so you can be ready to capitalize on the moment. Here are some quick tips for managing a raid.

  • Thank the raiders for joining the show and express your gratitude.
  • Ask the raider how their stream went. This helps start a conversation and shares the spotlight with the raider. You can also ask mods to give them a shout out in your chat with a chat bot command.
  • Introduce yourself, share your schedule, and details of your channel. Let them know what you’re doing right now in-game to bring them up to speed.
  • Don’t be afraid to ask raiders to follow. A follow costs nothing and mentioning it can help prompt people to hit the button. A quick thank you to those who do also goes a long way.
  • Once the above is done, continue with your stream.

It can feel exciting and overwhelming to get a raid. But to make the most of it you have to make the switch back to “content creation” mode to capture their attention.

It can also be beneficial to have something up your sleeve that you planned for that BIG raid that could happen.

Sit down and think about something that would capture your audiences attention. Maybe it’s using a funny build or loadout. Or opening a ton of micro-transaction boxes. It could be attempting or completing a feat/record that you’ve been working on.

A great example of this is Kripparrian’s “Button”. A goal project he had been working on for a while in Hearthstone. He completed his journey in front of 60,000 viewers and it went to the front page of reddit and stayed there for hours.

Think of what this exposure could do for your stream.

It doesn’t have to be extraordinary on the scale of Kripp. But use this as an example to have something planned to capture the moment. Do something exciting and fun to leverage all the new viewers and get them to stick around.

What if a raid turns bad?

While most raids are friendly, they can occasionally be malicious. If you get a raid which is less than supportive here are a few quick tips for getting back on track.

  • Let your mods step up. They can impose time outs or bans as needed.
  • Apologize to your viewers if it feels necessary but do not focus your chatter on the issue, drawing attention to trolls will only fuel the fire.
  • Switching chat to sub or follow only for a brief period can help get a grip on the situation, without your chat getting too flooded.
  • Make a note of the time you received the raid and the channel which raided you, so you can report them later. These details should also be captured in your Twitch raid settings.
  • Try and move past it quickly and don’t take it personally.

How To Get More Raids

While you cannot force people to raid you, there are some ways to get yourself noticed. If you want to get more raids try these top tips.

  • Be consistent. If you stream on a schedule then your stream will appear more regularly in the game feed when streamers are looking for people to raid. You’ll become the familiar face and increase your chances of getting a raid.
  • Don’t be afraid to stream something less popular. You stand more chance of standing out in the crowd when someone is looking to raid a channel.
  • Network. Make friends and connections with other streamers. Especially those within a specific gaming community. As you raid others you may also find they return the favor, especially if your community is a positive one.

Overall Twitch raids can be a great benefit to streamers of all sizes

If you get raided take a moment to welcome and thank everyone involved. Remember that a raider is trusting you with their community so treat them well, be they a crowd of 3000 or a group of 3.

Performing raids is a great way to network and grow. Use them as an opportunity to push yourself to try new things and engage with new people. Even if your channel is small, you still have a lot to offer.

A raid of five viewers may be nothing to a massive channel. But it could be everything to a small channel, so chose your targets wisely.

Finally try to see Twitch as a community, not a competition.

Streamers are often the best cheerleaders for other streamers. So build up your network and bring positivity to others, it will come back to you in spades.

Poop

The Differences Between Twitch Partner and Affiliate Programs

It can be hard to tell the real difference between becoming a Twitch Affiliate or Partner. What options you have available to you at each level? And even what it takes to become an affiliate or partner?

On the outside, it might seem like they are fairly similar and that could make it difficult to make a comparison.

That’s why we are here to save the day and explain the differences, it’s essentially a showdown: Twitch Partner vs Twitch Affiliate!

What is a Twitch Affiliate?

A Twitch Affiliate is a streamer who has reached a certain target in order to be offered a place in the Twitch Affiliate Program. Twitch Affiliates can start earning money on the platform and work to achieve the dream of making it their full-time career.

Essentially, as a Twitch Affiliate, you can start earning an income through bits, subs, and eventually ad income. This program is a way to recognize and compensate the hard work small to medium sized streamers are putting in.

Twitch Affiliate Requirements

I’m sure you are now desperate to know how you can become a Twitch Affiliate and earn money from playing video games, you want to live every nerd’s dream!

Twitch has laid out a few targets that you have to meet to be considered a dedicated and qualified enough streamer, these are as follows:

  • You must have at least 50 followers
  • Over the last 30 days you have at least 500 total minutes broadcast
  • 7 unique broadcast days
  • You have an average of 3 or more concurrent viewers

These targets can be quite the challenge to meet if you’re just starting out. So if you do receive that highly anticipated email from Twitch inviting you to become an Affiliate, you might want to pop that champagne and celebrate, you are doing great!

What is a Twitch Partner?

A Twitch Partner is what Twitch considers to be the world’s most popular video game broadcasters. There’s currently only 27,000 partners total in the world. In order to be considered for the Twitch Partner Program, you have to already be a Twitch Affiliate, and you have to apply for partnership.

Twitch Partner’s earn money just like Affiliate’s do but they also get a lot of other added bonuses alongside the money which can improve the quality of content or quality of engagement with their audience. Additionally, partners also unlock the ability to receive revenue from Twitch ads.

Here’s a run down of the extra partner features:

  • Custom Cheermotes
  • Can unlock up to 50 custom sub emotes
  • Ability to get revenue share from ads displayed during your stream
  • Full access to video transcoding
  • Past broadcasts store for 60 days instead of 14
  • Access to priority Partner Support
  • The sexy verified channel badge:

Twitch Partner’s can also get special treatment at gaming events. because who doesn’t want to see inside the fancy Twitch Partner lounge?

Twitch Partner Requirements?

As mentioned before, in order to become a Twitch Partner, you will need to apply. There are no minimum view or follower requirements but there are certain things that the Twitch overlords look for.

They look at three areas in particular:

  1. Content
  2. Average viewership (70-80 average viewers is the minimum)
  3. Stream frequency and schedule

Twitch admins are looking for Partners who have a strong, loyal community that they engage with frequently, they are also looking for streamers who would be great brand representatives for Twitch.

So, if you’re looking to become a partner, you might want to make sure that you are sticking to those community guidelines in your streams…

Concurrent viewership is incredibly important as Twitch wants to know that you are consistent and that your viewers love your content. They place no numbers on what you need to become a Partner, basically, be good at streaming, passionate and you will go far.

What are the benefits of each scheme?

Becoming a Twitch Affiliate and a Twitch Partner each have their own benefits. Everyone always wants to become a Partner to be seen as ‘the best of the best’ but you shouldn’t turn your nose up at the opportunity of just being a Twitch Affiliate, they are both pretty sweet programs.

The benefits of being a Twitch Affiliate

If you have succeeded in becoming a Twitch Affiliate, congrats! If you want to see what’s in it for you, read on my friend.

Twitch Affiliates can earn money from their followers through subscriptions. You can accept subscriptions on your channel for $4.99, $9.99, $24.99, and the Twitch Prime free subscription.

With each tier, subscribers will receive different benefits, from ad-free viewing to exclusive emoticons and subscriber badges.

You also have the ability to earn money with Bits. These mysterious Bits are a great way for your followers to cheer you on while streaming. Bits are basically virtual goods that can be bought and used in your streams, you will earn a portion of the revenue whenever a follower uses them.

Lastly, you can earn money through game sales! This is a pretty awesome feature where, during your stream, Twitch insert an offer underneath the video which is selling the game you are playing or in-game items you are using.

If one of your lovely supporters buy the game by clicking that button, you will get a 5% share of the profits, nice!

The benefits of being a Twitch Partner

So, being a Twitch Affiliate sounds pretty great right? There are loads of ways to earn money and Twitch recognizes you as an awesome, dedicated hard-working streamer. Let’s take a little look at what being a Twitch Partner can offer you.

Twitch Partners can enjoy all of the lovely things that Twitch Affiliates get and then some.

Partners can fully monetize their channel by unlocking the ability to use ads on their stream and receive a portion of the income, not just relying on followers to give them money through Bits etc.

Twitch Partners can potentially earning even more money through subscriptions on their channel, depending on the contract that is signed.

You can also have no quality limitations on your channel, meaning your viewers can really enjoy your stream and your wonderful face in the highest definition and speeds!

Lastly, at any gaming events, Twitch Partner’s are basically treated like royalty by game developers, letting you play closed-betas, and schmoozing you up hoping to get your attention to share their content with your audience.

What restrictions come with each program?

As they say, the grass is always greener! Both programs sound great as you get money for streaming which is quite literally fun and games (a little added work too). However, they do come with some restrictions which could put some streamers off.

If you multi-stream your content on YouTube either/or Mixer, you will be unable to do this as a Twitch Affiliate/Partner.

Furthermore, you won’t be able to share your streams on any other platforms for 24 hours after.

If you have a bigger audience on YouTube or Mixer, you might want to consider focusing on these and saying ‘thanks but no thanks’ to the Affiliate and Partner programs.

You can negotiate different contracts with Twitch, but content exclusivity is one of the big benefits for Twitch’s business model, so it might be hard to get those restrictions removed. But there’s no harm in asking.

So, what should you do?

It really does depend on your individual situation. If you are a streamer who uses only Twitch and want to turn it into a living, go ahead and make Affiliation your goal! Once you reach that step, there’s no reason to not become a partner.

If you stream on multiple platforms and gain a lot of attention on those other platforms, you might want to keep your options open or work on negotiating a different contract instead of the standard partner/affiliate contracts before committing yourself to the Twitch overlords.

All in all, the Twitch affiliate/partnership program provides content creators with a way to create revenue streams from doing what they love.